Making a Queen Elizabeth cake (well, on the sixth attempt)
Who knew that cheap, basic ingredients could be the key to baking success
Queen Elizabeth cake: success!
Share
Or possibly the seventh attempt.
Let me back up: I’m co-producing a Diamond Jubilee baking extravaganza on Sunday. It’s our version of the thousands of street parties that are happening all over Britain. I normally make cookies, bars and loaves, but this time, the top of the list was the appropriately named Queen Elizabeth cake.
The story I’ve always been told about the dessert is that it was created for her coronation in 1953, when there was still rationing in Britain. So they needed to make a cake that took little sugar, just one egg and no butter. Others say it was made for the 1937 coronation of King George VI and Queen Elizabeth (the Queen Mother). Regardless, it is a staple in church bake sales and farmers’ markets. It’s relatively low in fat and has a lovely dark flavour.
My recipe was given to me by a fellow baker in the office. I’d tucked it away in my recipe box and there it sat for years, until I needed it for my Diamond Jubilee baking. And there started three weeks of Queen Elizabeth cake misery. My first attempt fell in the middle. Think a massive crater–not the Sudbury basin, but not good. Still I took it into work, where my colleagues ignored its unappetizing appearance (apparently homemade sweets all look good) and devoured it in seconds. I consulted with office baking experts, who concluded my dates, lovely ones from Saudi Arabia, were just too good. The recipe needed cooking dates. So I bought chopped up dates and tried again, also reducing the water. The result was good (ignoring the slight droop in the middle). Again it was demolished by the office.
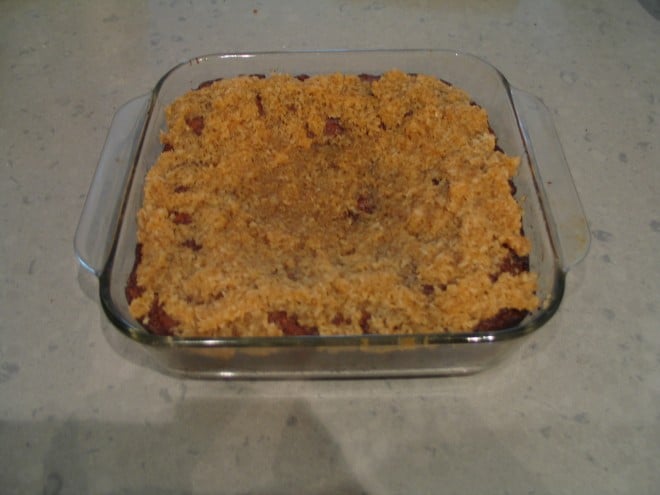
Confident I had successfully tweaked the recipe, I ignored it until the week before the Diamond Jubilee weekend. My next attempt could be called “the crater’s revenge”–I didn’t even add the icing. It wasn’t worth it. More tweaking. The next one was even worse. It went into the garbage. My Diamond Jubilee baking compadre tried to calm me down–if it didn’t work then, who would know? I could just make more bars and cookies. But I wasn’t about to give up. So more anxious consultations with baking buddies. Maybe my baking soda and powder were old. Off I went to get new supplies. The next version was better (see No. 1 below) but not great.

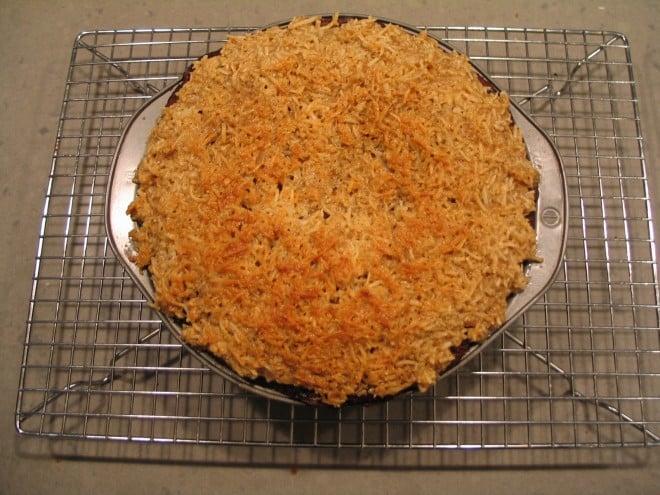
Now in a panic, I reached out the original source of the recipe for help, asking detailed questions. His version always turned out though, yes, it would droop a little. So out went the glass pan and vegetable shortening, replaced with a round tin and classic lard. I returned to the recipe’s original measurements, upped the cooking time and waited anxiously. It drooped but held (No. 2). Yahoo.

This morning I’d run out of dates (and sugar and flour…oh, stop laughing), and so I bought a block of cooking dates. When I added the baking soda to the boiling water and dates, I could see the soda breaking down the dried fruit. The mixture looked thicker. I was optimistic. And yes, 43 minutes later, I had success.
LESSON: when a recipe calls for cheap, basic ingredients, then don’t automatically upgrade. And call in expert help at the first sign of trouble. So thank you Jared Mitchell, who will always be known as the “man who saved the Diamond Jubilee.”
RECIPE
1 c boiling water
1 c chopped dates, from a block
1 tsp baking soda
1/4 c lard
1 c white sugar
1 egg
1 tsp vanilla
1 1/2 c all-purpose flour
1 tsp baking powder
1/2 tsp salt
1/2 c chopped walnuts or pecan
Preheat oven to 350 F
1. In a small bowl, pour boiling water over dates. Stir in baking soda; leave until cool.
2. Beat together lard, sugar, egg and vanilla until light. Stir together flour, baking powder and salt: add to creamed mixture alternately with date mixture (starting and ending with flour mixture) and combine well. Fold in nuts.
3. Spread evenly in well-greased 8-inch cake tin. Bake 30-40 minutes until tester comes out clean. (The cake will be very brown).
4. Let cool completely, then add topping, if wanted.
TOPPING
1/4 c unsalted butter, soft
1/3 c packed brown sugar
3/4 c shredded coconut (long, not short)
2 tbsp table cream (18 per cent)
1. Mix together and spread evenly on cake. Broil for 4-6 minutes until light brown. (Watch it carefully, it will burn in a flash.)